 |
|||||
|
|
|||||
|
|
|
||||||||||||
 |
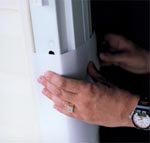
Step
1
Place jamb plate on interior jamb casing (centered on deadbolt and as close to the edge as reasonably possible) and mark the two holes. The closer the plates (on the jamb and door) are together the less leverage can be applied against the deadbolt and the greater the shearing strength which of course makes the bolt, door and jamb stronger. |
|
|||||||||||||||||
 |
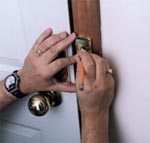
Step
2
Transfer the hole markings to the brick moulding on the outside of the jamb using a level, square, or sheet of paper. The idea is to have the hole markings, interior and exterior, on the same horizontal plane. |
|
|||||||||||||||||
 |
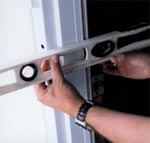
Step
3
Drill in 1/2 way from both sides meeting in the middle. If you don't immediately join with the other half of the hole wiggle the drill in the hole until you do. Insert exterior jamb plate (long sleeved) from the outside and check the length of bolts from the inside. If required cut bolts to shorten or lengthen with an appropriate length of 1/4" threaded rod (not provided), or even an appropriate 1/4" bolt with it's head removed (not provided) using the coupling nuts provided. |
||||||||||||||||||
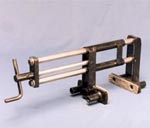 |
Installing
Many Bolt Buddies
If you are installing many Bolt Buddies, rent or purchase a Bolt Buddy installation jig. |
||||||||||||||||||
 |
 |